As my kids continue down the path of wanting to be spies, a
couple of awesome things have happened. One, the toys are much cooler. I’ll take
night vision goggles and walkie talkies over talking Fantastic Gymnastics Dora
any day (sorry Dora!). Two, the books are more exciting. Nancy Clancy beats
Fancy Nancy any day, I kind of like Young Cam Jansen, and the non-fiction stuff
the kids are bringing home is teaching me along with the kids. Not to mention
that the kids have their noses in books more and more, which is generally a
good thing. But the third great outcome of the recent spy obsession is that the
kids are much more observant lately (blame the binoculars). All kinds of little
every day things require additional exploration.
One of the biggest things that the kids are all about
understanding is how the roads work. You see, as spies they might be tapped at
any moment, given keys to a fancy car, and sent on a secret mission. As such, they
need to really understand how to drive. Our every car ride last week was filled
with, “why are there two double lines on that side of the road?” or “what does a yellow
diamond sign with two connected black lines mean?”
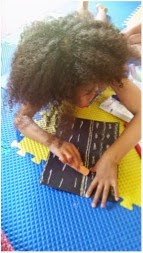
So this weekend we designed our own city to explore why all
of those signs and lines are there. This is easy and mostly mess-free. All you
need is construction paper, chalk, scissors, and tape.
First we need places to go. I ask the kids what the most
important places to have in a city are. They say: a home, friends’ homes,
school, doctor’s office, a water park, a “regular” park, a gym (meaning for
gymnastics and cheer practices), a supermarket, work, and New York City (which
they’ve never been to) and Florida for vacations. So we make those.
Then we spend some time thinking about where everything
should be. The kids think that the
doctor and the friends should be close to our house. It's fun watching them
reason out how far away school and work should be. We separate the places
around the playroom mat (so chalk doesn’t get all over the floor).
I then tell them the basics of creating a road.
-The lines: Yellow
lines mean don’t cross them. Double yellow lines mean traffic is going in the
opposite direction on the other side of it. White dashed lines are lane
markings. The kids want turn lanes too, so I tell them that they would have a white arrow. No, the kids want the turn lanes you can stop in the middle of the street on that are double yellow lines with lots of yellow diagonal lines inside. Okay. We add those to our little key too.
-The size: Big
streets don’t usually go through smaller areas. You need more lanes if you
think there will be lots of traffic.
-The signs: If
two roads meet you’ll need stop signs or yield signs so everyone doesn’t crash.
Stop signs usually happen on smaller roads. On big roads or highways, people
are going fast so you might want to have the smaller merging road yield to the
fast road.
Then I let them create roads through their city.
While the kids are hard at work, I listen to them debating
the best way to get places. They talk about how to get home from school it’s a
short ride on a highway and then a longer ride on smaller roads.
They ask me, “do
you think it takes this long to make a real road?” Since it took only about
thirty minutes to make our whole city, I tell them, “no, it takes much longer.
Weeks even.” We stop to talk about construction and the steps to planning,
ordering supplies, getting a crew, pouring, smoothing, and setting a road. Then
they are back with new plans for their roads.
Usually we are doing more mom-involved science experiments
and the like, so I appreciate that they can do this one all on their own. I
make lunch while they scream, “don’t look yet!” periodically, and do their
own troubleshooting.
Then they want to make two ways to get to every place in
their city so the occupants would have some variety. Unfortunately, we have to go
get dressed and get on the road ourselves. We can always build more another
day. The road is calling...
<3 Pedigreed Housewife


Comments
Post a Comment